Showing posts with label Blogger Hacks. Show all posts

Render Blogger Blog in IE using Google Chrome Frame

Friday, December 3, 2010

Google Chrome Frame is an open source plug-in that seamlessly brings Google Chrome's open web technologies and speedy JavaScript engine to Internet Explorer. Older versions of IE doesn’t support the latest web technologies like HTML5 and CSS3. With Chrome Frame, all these new Technologies will be supported.


What is this Google Chrome Frame (GCF) ?


How can i Render my Blogger Blog using the Chrome Frame?

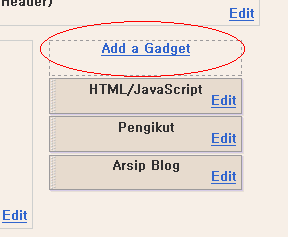
1. Log in to your Blogger account
2. Go to Design > Edit HTML tab.
3. Look for <head> and immediately below it paste the following line of code.
<meta http-equiv='X-UA-Compatible' content='chrome=1'/>
4. Save the Template
Now if anyone visits your Blog using Internet Explorer and if he/she has already installed the Google Chrome Frame on his/her PC, then your Blog will be rendered using GCF

Advantages of adding this one line code

1. Better and Faster Rendering (if GCF is installed on the visitors PC)
2. Normal rendering (if GCF is not installed) – No the user won’t be prompted to install the Chrome Frame(unless you add some extra scripts to do that).

How can i prompt the visitor to install the Chrome Frame?

If you want, you can prompt IE users( who have not installed GCF) to install GCF. This is optional . To prompt users, Follow these steps.
1. Once again Login to your Blogger Account
2. Go to Design > Edit HTML
3. Look for </head> and just above  that add the following code snippet
<!--[if IE]>
<script type="text/javascript" src="http://ajax.googleapis.com/ajax/libs/chrome-frame/1/CFInstall.min.js"></script>
<style type='text/css'>
.chromeFrameOverlayContent{top:10px;margin-top:10px;}
</style>
<script>
     window.attachEvent("onload", function() {
       CFInstall.check({
         mode: "overlay"
       });
     });
</script>
<![endif]-->
4. Save the Template. Now the IE  user will be prompted to install the Chrome Frame(if he hasn’t got it already). This prompt will appear only once(stored in cookie).
Read more »

Very Effective SEO tips for Blogger Templates

Saturday, October 30, 2010


Search Engine Optimization tips for Blogger Templates

These days, there is much discussion of how blog content can be optimized for search engines in order to receive better rankings. But have you considered how your blog template can be optimized too?

Swap Title Tags for Better SEO

If you open a post on your blog and look at the top of your browser, you'll see that your blog title is shown first and then the post title comes. We can improve our SEO (search engine optimization) by swapping these two tags so that the post title should appear first and the blog title after it.
1- Log in to Blogger | Dashboard | Layout | Edit HTML.
2- Find:
<title><data:blog.pageTitle/></title>
3- Replace the above code with the following one:
<b:if cond='data:blog.pageType == &quot;index&quot;'>
<title><data:blog.title/></title>
<b:else/>
<title><data:blog.pageName/></title>
</b:if>

4- Save your template and see what appears first, your blog title or the post title.


Source: blogger-dashboard.blogspot.com
Read more »

Animated Recent posts for blogger with thumbnails and Simple Spy

Tuesday, October 12, 2010

Finally Abu Farhan finished the widget from Bloggertricks.com and animation Simple Spy . Simple Spy style taken from Scarlet theme, results for wordpress can be found in this blog. View as below

Animated Recent posts widget for blogger


For bloggers you need to put the widget into the Sidebar Gadget (add gadget) select html, copy all html below to that gadget:

<script src="http://ajax.googleapis.com/ajax/libs/jquery/1.3.2/jquery.min.js" type="text/javascript"></script>
<style type="text/css" media="screen">
<!--
#spylist {
overflow:hidden;
margin-top:5px;
padding:0px 0px;
height:350px;
}
#spylist ul{
width:220px;
overflow:hidden;
list-style-type: none;
padding: 0px 0px;
margin:0px 0px;
}
#spylist li {
width:208px;
padding: 5px 5px;
margin:0px 0px 5px 0px;
list-style-type:none;
float:none;
height:70px;
overflow: hidden;
background:#fff url(http://dl.getdropbox.com/u/708209/scriptabufarhan/recentspy/post.jpg) repeat-x;
border:1px solid #ddd;
}
#spylist li a {
text-decoration:none;
color:#4B545B;
font-size:11px;
height:18px;
overflow:hidden;
margin:0px 0px;
padding:0px 0px 2px 0px;
}
#spylist li img {
float:left;
margin-right:5px;
background:#EFEFEF;
border:0;
}
.spydate{
overflow:hidden;
font-size:10px;
color:#0284C2;
padding:2px 0px;
margin:1px 0px 0px 0px;
height:15px;
font-family:Tahoma,Arial,verdana, sans-serif;
}
.spycomment{
overflow:hidden;
font-family:Tahoma,Arial,verdana, sans-serif;
font-size:10px;
color:#262B2F;
padding:0px 0px;
margin:0px 0px;
}
-->
</style>
    <script language='JavaScript'>
imgr = new Array();
imgr[0] = "http://i43.tinypic.com/orpg0m.jpg";
imgr[1] = "http://i43.tinypic.com/orpg0m.jpg";
imgr[2] = "http://i43.tinypic.com/orpg0m.jpg";
imgr[3] = "http://i43.tinypic.com/orpg0m.jpg";
imgr[4] = "http://i43.tinypic.com/orpg0m.jpg";
showRandomImg = true;
boxwidth = 255;
cellspacing = 6;
borderColor = "#232c35";
bgTD = "#000000";
thumbwidth = 70;
thumbheight = 70;
fntsize = 12;
acolor = "#666";
aBold = true;
icon = " ";
text = "comments";
showPostDate = true;
summaryPost = 40;
summaryFontsize = 10;
summaryColor = "#666";
icon2 = " ";
numposts = 10;
home_page = "http://www.raudhatulmuhibbin.org/";
limitspy=4
intervalspy=4000
</script>
<div id="spylist">
    <script src='http://dl.getdropbox.com/u/708209/scriptabufarhan/recentspy/recentpostthumbspy-min.js' type='text/javascript'></script>
</div>
for modification this widget to fit your template than you need to visit ABU FARHAN Blog here you go


Source: blogger-dashboard.blogspot.com
Read more »

Label Cloud Widget for Blogger new release

Tuesday, October 5, 2010

Blogger Releases the new version of the Label Widget

Blogger,as a part of its 10th Birthday celebrations, has now released a new version of the label gadget.This one is much better that the old version
What is new?
1)It comes with a Label Cloud.
2)It lets you choose which labels are to be displayed.
3)You can customize it further using CSS.
Drawbacks
The cloud just has 5 variations.All labels will be divided into 5 classes depending on the usage of these labels.
It would have been better if there was a bigger number of classes.

 
as you see above ! you have the option to select whatever category you want it to show ! if you have any question just leave comment and i will answer you ASAP ! Happy Clouds :)


Source: blogger-dashboard.blogspot.com
Read more »

Adding comment form beneath your blog posts in blogger

Saturday, September 18, 2010


How to Add Comment Form Beneath Your Posts

Blogger have developed an inline (embedded) comment form which can be enabled through Blogger in Draft. This is probably the most requested feature for Blogger


1- Log in to Blogger | Dashboard | Settings | Comments.
2- For the third option Comment Form Placement, chose Embedded below post and then click SAVE SETTINGS button to save your changes.
3- Now, go to Layout | Edit HTML.
4- Check Expand Widget Templates and your page will automatically refresh.
5- Find:
<b:include data='post' name='comments' />
6- Place the following code right after the above code:
<b:include data='post' name='comment-form'/>
7- Now, your code should look something like this:
<b:include data='post' name='comments' />
<b:include data='post' name='comment-form'/>

8- Save your template and you're done.

Read more »

Easy steps to Add Blogger Sitemap to Google Webmaster Tools!

Sunday, September 12, 2010


Google Webmaster Tools help your customers understand site traffic and diagnose potential problems by providing insights into how Google crawls and indexes their site.
Webmaster Submission Guide
Submitting the Sitemaps of your blog to Google Webmaster helps the search engine(Google) to crawl your webpage's easily and more quickly! This post explains the procedure to add your blogger blog's sitemap to the Google Webmaster Tools.


  1. Sign-in to Google Webmaster Dashboard using your Google Account.

  2. Type your blog URL and click Add Site:
    Add Blogger Sitemap to Google Webmaster Tools

  3. Once your site is added to Google Webmaster, you need to verify the site by adding a Meta Tag to your blog:
    Add Blogger Sitemap to Google Webmaster Tools

  4. Copy the Meta Tag code given by Google Webmaster as shown in the screenshot below:
    Add Blogger Sitemap to Google Webmaster Tools

  5. Now go to Blogger Dashboard - Layout - Edit HTML - then search(Ctrl+F) for the code given below in the header section:

    <b:include data="blog" name="all-head-content"/>


  6. Then Paste the Meta Tag just after the above code and Save the Template.

  7. Now click Verify in the Google Webmaster Tools. Your site will be verified if you followed the above steps clearly:
    Add Blogger Sitemap to Google Webmaster Tools

  8. Next step is to add sitemaps of your blog. Select Sitemap from the left sidebar:
    Add Blogger Sitemap to Google Webmaster Tools

  9. You can add the following sitemaps of your blogger blog to the Google Webmaster:

    http://www.YourBlog.com/atom.xml?redirect=false

    http://www.YourBlog.com/feeds/posts/default?=rss

    Add Blogger Sitemap to Google Webmaster Tools
  10. Finished! Your Blog's sitemap will be added to Google now!
If you have any question just leave me a comment and i will answer you ASAP !
Happy Blogging :)

Read more »

Related Posts Widgets - Top 5 for Blogspot

 
Searching for Related Posts Widgets for Blogger ?
Well here is the best 5 related post widgets for blogger you can ever find until now !
It's little complicated process to add Related Posts widget or plug-in to Blogger blogs unlike Wordpress blogs. Following are some of the links on how to add Related Posts widget to blogger blogs:


Please Note: Before Editing your Template, Save a copy of your current template by clicking 'Download Full Template' in 'Edit HTML' page of the Blogger 'Layout' Window and 'Preview' the changes before Saving.


Read more »

How to insert Codes and Scripts in Blogger Posts

Saturday, January 30, 2010

If you enter any Java Script or HTML code in your posts, Blogger will automatically execute that code considering it a regular part of your post. We just need to encode our HTML special characters like <, >, & into entities <, >, &. This is a really painful process but Beta Templates is here to help you.


1- Go http://www.blogcrowds.com/resources/parse_html.php or to http://www.eblogtemplates.com/blogger-ad-code-converter/  paste your code in the box there and press CONVERT AD CODE button.
2- The page will refresh and you'll see that the code you pasted in the box has changed. Don't worry, copy that code and paste it in your post.

3- Publish your post and you'll see that your original code will appear perfectly without execution.
Tip: When you're trying to directly copy-paste Adsense code in Blogger HTML, you'll first need to convert it otherwise you might receive an error.

Read more »

How to Add Favicon ico in Blogger template

Tuesday, December 22, 2009


What is a Favicon?

A favicon is a small 16X16 image located at the top of your browser in the url bar.
All Blogger templates have a default favicon but we can easily replace it with our own for better branding and personalization.

How to Change your Favicon?

1- Create an image and convert it to a favicon by going to FavIcon Generator or Favicon from pics.
2- Upload your favicon to some image host like PhotoBucket, ImageShack or TinyPic and get the image URL or link.
3- Now log in to Blogger | Dashboard | Layout | Edit HTML and find </head> and place the following code just before </head> tag.
<link rel="shortcut icon" href="YOUR FAVICON URL" />
<link rel="icon" href="YOUR FAVICON URL" />
4- Your code should look something like this:
<link rel="shortcut icon" href="YOUR FAVICON URL" />
<link rel="icon" href="YOUR FAVICON URL" />
</head>
5- Replace YOUR FAVICON URL with the URL of your image and then save your template.

Source: blogger-dashboard.blogspot.com
Read more »


Copyright © 2010 Blogger Tips And Tricks | Affiliate Marketing | Make Money Blogging. All Rights Reserved. Using Xclear Theme | Bloggerized by Themescook Developed by Helios | Powered by Blogger