Showing posts with label Blogger Widgets. Show all posts

Easy 5 tabbed Content Widget for Blogger

Wednesday, November 24, 2010

Many people don’t want to give effort and they like the easy one :) me too sometimes !

very easy  tabbed Content Widget for Blogger

First this widget brought to you by bloganol !
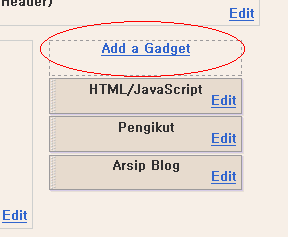
To install This Widget in Your Blog , Go to Blogger ; Add a new Page Element ; Html/JavaScript ; and Paste this Code There.


<!-- widget by Bloganol.blogspot.com -->
<script language="JavaScript" type="text/javascript">
function st2(t){
for(i=1;i<=5;i++){
ts=document.getElementById('tt'+i);
tr = document.getElementById('dd'+i);
ta = document.getElementById('aa'+i);
if(t==i){
if(t==1) ts.className="Tab1";
if(t==2) ts.className="Tab2";
if(t==3) ts.className="Tab3";
if(t==4) ts.className="Tab4";
if(t==5) ts.className="Tab5";
ta.className="srchlinksel2";
ts.style.borderBottom="1px solid #FFFFFF";
tr.style["display"]="block";
tr.style["visibility"]="visible";
}
else{
ts.className="tb2";
ta.className="srchlink2";
ts.style.borderBottom="1px solid #B5D6EF";
tr.style["display"]="none";
tr.style["visibility"]="hidden";
}
}
}
</script>


<!-- CSS Begin //-->

<style type="text/css">.f10 {
FONT-SIZE: 10px; FONT-FAMILY: arial
}
.f11 {
FONT-SIZE: 11px; FONT-FAMILY: arial
}
.f12 {
FONT-SIZE: 12px; FONT-FAMILY: arial
}
.f12r {
FONT-SIZE: 12px; LINE-HEIGHT: 13px; FONT-FAMILY: arial
}
.f12n {
FONT-SIZE: 12px; LINE-HEIGHT: 1.3em; FONT-FAMILY: arial
}
.ft11a {
FONT-SIZE: 11px; LINE-HEIGHT: 13px; FONT-FAMILY: Tahoma
}
.fv9 {
FONT-SIZE: 9px; FONT-FAMILY: verdana
}
.fv10 {
FONT-SIZE: 10px; FONT-FAMILY: verdana
}
.ft11 {
FONT-SIZE: 11px; LINE-HEIGHT: 14px; FONT-FAMILY: Tahoma
}
.fmicro9 {
FONT-SIZE: 9px; FONT-FAMILY: Microsoft Sans Serif
}
A.srchlink:link {
COLOR: #2864b4; TEXT-DECORATION: none
}
A.srchlink:visited {
}
A.srchlinksel:link {
CURSOR: text; COLOR: #000000; TEXT-DECORATION: none
}
A.srchlinksel:visited {
CURSOR: text; COLOR: #000000; TEXT-DECORATION: none
}
A.srchlink2:link {
COLOR: #2864b4; TEXT-DECORATION: underline
}
A.srchlink2:visited {
COLOR: #2864b4; TEXT-DECORATION: underline
}
A.srchlinksel2:link {
CURSOR: text; COLOR: #000000; TEXT-DECORATION: none
}
A.srchlinksel2:visited {
CURSOR: text; COLOR: #000000; TEXT-DECORATION: none
}
.tb2 {
FILTER: progid:DXImageTransform.Microsoft.Gradient
(GradientType:0,StartColorStr:'#EEF5FB',EndColorStr:'#D9E9F6');BACKGROUND-COLOR: #d9e9f6
}
.tbmain2 {
BACKGROUND-COLOR: #ffffff
}
.lfttbl {
FILTER: progid:DXImageTransform.Microsoft.Gradient
(GradientType:0,StartColorStr:'#DEFFC6',EndColorStr:'#B7E4A2'); BACKGROUND-COLOR: #deffc6
}
.rttbl {
BORDER-RIGHT: #b5d6ef 1px solid; BORDER-TOP: #b5d6ef 1px solid; FILTER: progid:DXImageTransform.Microsoft.Gradient
(GradientType:0,StartColorStr:'#EEF5FB',EndColorStr:'#DEEFF7'); BORDER-LEFT: #b5d6ef 1px solid; BORDER-BOTTOM: #b5d6ef 1px solid; BACKGROUND-COLOR: #eef5fb
}
.rttblx {
BORDER-RIGHT: #b5d6ef 1px solid; BORDER-TOP: #b5d6ef 1px solid; BORDER-LEFT: #b5d6ef 1px solid; BORDER-BOTTOM: #b5d6ef 1px solid; BACKGROUND-COLOR: #ffffff
}
.rt_tbl {
BORDER-RIGHT: #b5d6ef 1px solid; BORDER-TOP: 0px; BORDER-LEFT: #b5d6ef 1px solid; BORDER-BOTTOM: #b5d6ef 1px solid; BACKGROUND-COLOR: #b0dafd
}
.toptbl {
FILTER: progid:DXImageTransform.Microsoft.Gradient
(GradientType:0,StartColorStr:'#4A84AD',EndColorStr:'#00426B'); BACKGROUND-COLOR: #00426b
}
.srchtbl {
FILTER: progid:DXImageTransform.Microsoft.Gradient
(GradientType:0,StartColorStr:'#FFFFFF',EndColorStr:'#A5DEDE'); BACKGROUND-COLOR: #a5dede
}
.Tab1 {
FILTER: progid:DXImageTransform.Microsoft.Gradient
(GradientType:0,StartColorStr:'#FEDFB3',EndColorStr:'#FFFFFF');
BACKGROUND-COLOR: #fedfb3
}
.Tab2 {
FILTER: progid:DXImageTransform.Microsoft.Gradient
(GradientType:0,StartColorStr:'#B39DFE',EndColorStr:'#FFFFFF');
BACKGROUND-COLOR: #b39dfe
}
.Tab3 {
FILTER: progid:DXImageTransform.Microsoft.Gradient
(GradientType:0,StartColorStr:'#F6FE9D',EndColorStr:'#FFFFFF');
BACKGROUND-COLOR: #f6fe9d
}
.Tab4 {
FILTER: progid:DXImageTransform.Microsoft.Gradient
(GradientType:0,StartColorStr:'#FEAF9D',EndColorStr:'#FFFFFF');
BACKGROUND-COLOR: #feaf9d
}
.Tab5 {
FILTER: progid:DXImageTransform.Microsoft.Gradient
(GradientType:0,StartColorStr:'#9DFEA5',EndColorStr:'#FFFFFF');
BACKGROUND-COLOR: #9dfea5
}
A {
TEXT-DECORATION: none
}
A:hover {
TEXT-DECORATION: underline}
</style>
<!-- CSS End //-->
<!-- Widget Code Ends Here -->


<!-- widget by Bloganol.blogspot.com -->

<table border="0" cellspacing="0" cellpadding="0"
width="380">
<tbody>
<tr>
<td align="middle" onclick="st2('1')" height="22" id="tt1"
style="BORDER-RIGHT: #b5d6ef 1px solid; BORDER-TOP: #b5d6ef
1px solid; BORDER-LEFT: #b5d6ef 1px solid" width="70"
class="Tab1"><a id="aa1"
class="srchlinksel2" href="javascript:undefined"><font
class="f12"><b>TAB1</b></font></a></td>
<td style="BORDER-BOTTOM: #b5d6ef 1px solid" width="2">
<table border="0" cellspacing="0" cellpadding="0" width="2">
<tbody>
<tr>
<td width="2"></td></tr></tbody></table></td>
<td align="middle" onclick="st2('2')" height="22" id="tt2"
style="BORDER-RIGHT: #b5d6ef 1px solid; BORDER-TOP: #b5d6ef
1px solid; BORDER-LEFT: #b5d6ef 1px solid; BORDER-BOTTOM:
#b5d6ef 1px solid" width="47"
class="tb2"><a id="aa2"
class="srchlink2" href="javascript:undefined"><font
class="f12"><b>TAB2</b></font></a></td>
<td style="BORDER-BOTTOM: #b5d6ef 1px solid" width="2">
<table border="0" cellspacing="0" cellpadding="0" width="2">
<tbody>
<tr>
<td width="2"></td></tr></tbody></table></td>
<td align="middle" onclick="st2('3')" height="22" id="tt3"
style="BORDER-RIGHT: #b5d6ef 1px solid; BORDER-TOP: #b5d6ef
1px solid; BORDER-LEFT: #b5d6ef 1px solid; BORDER-BOTTOM:
#b5d6ef 1px solid" width="62"
class="tb2"><a id="aa3"
class="srchlink2" href="javascript:undefined"><font
class="f12"><b>Tab3</b></font></a></td>
<td style="BORDER-BOTTOM: #b5d6ef 1px solid" width="2">
<table border="0" cellspacing="0" cellpadding="0" width="2">
<tbody>
<tr>
<td width="2"></td></tr></tbody></table></td>
<td align="middle" onclick="st2('4')" height="22" id="tt4"
style="BORDER-RIGHT: #b5d6ef 1px solid; BORDER-TOP: #b5d6ef
1px solid; BORDER-LEFT: #b5d6ef 1px solid; BORDER-BOTTOM:
#b5d6ef 1px solid" width="48"
class="tb2"><a id="aa4"
class="srchlink2" href="javascript:undefined"><font
class="f12"><b>Tab4</b></font></a></td>
<td style="BORDER-BOTTOM: #b5d6ef 1px solid" width="2">
<table border="0" cellspacing="0" cellpadding="0" width="2">
<tbody>
<tr>
<td width="2"></td></tr></tbody></table></td>
<td align="middle" onclick="st2('5')" height="22" id="tt5"
style="BORDER-RIGHT: #b5d6ef 1px solid; BORDER-TOP: #b5d6ef
1px solid; BORDER-LEFT: #b5d6ef 1px solid; BORDER-BOTTOM:
#b5d6ef 1px solid" width="52"
class="tb2"><a id="aa5"
class="srchlink2" href="javascript:undefined"><font
class="f12"><b>Tab5</b></font></a></td></tr>
<tr>
<td colspan="9">
<div style="BORDER-RIGHT: #b5d6ef 1px solid; BORDER-TOP:
0px; BORDER-LEFT: #b5d6ef 1px solid; WIDTH: 380px;
BORDER-BOTTOM: 0px"
><!-- Main Headlines Begin //-->
<table border="0" cellspacing="0" cellpadding="0"
width="380" height="5">
<tbody>
<tr>
<td height="5"></td></tr></tbody></table>
&nbsp;&nbsp; <font color="#797979" class="f10"
>
<!-- wmlheadline begin -->
<!-- TDate Begin -->
<!-- Date Begin -->
Browse Items</font>
<!-- Date End -->
<!-- TDate End -->
<div id="dd1" style="BORDER-RIGHT: #b5d6ef 0px solid;
BORDER-TOP: 0px; DISPLAY: block; VISIBILITY: visible;
BORDER-LEFT: #b5d6ef 0px solid; WIDTH: 380px; BORDER-BOTTOM:
#b5d6ef 1px solid"
>
<table border="0" cellspacing="0" cellpadding="0"
width="380">
<tbody>
<tr>
<td width="14"></td>
<td valign="top"><font color="#16387c" class="f12n">Tab 1
Content</font></td>
</tr>
<tr>
<td colspan="2" align="right"><font class="f10"><b> Widget
by <a href="http://bloganol.blogspot.com/2008/03/5-tabbed-content-widget-for-blogger.html"
target="_blank">Bloganol</a></b>
&nbsp; </font></td></tr>
<tr>
<td height="4"></td></tr></tbody></table></div><!-- Main
Headlines End //--></div>
<div id="dd2" style="BORDER-RIGHT: #b5d6ef 1px solid;
BORDER-TOP: 0px; DISPLAY: none; VISIBILITY: hidden;
BORDER-LEFT: #b5d6ef 1px solid; WIDTH: 380px; BORDER-BOTTOM:
#b5d6ef 1px solid"
><!-- News Begin //-->
<table border="0" cellspacing="0" cellpadding="0"
width="380">
<tbody>
<tr>
<td width="14"></td>
<td valign="top"><font color="#16387c" class="f12n">Tab 2
Content</font></td></tr>
<tr>
<td colspan="2" align="right"><font class="f10"><b> Widget
by <a href="http://bloganol.blogspot.com/2008/03/5-tabbed-content-widget-for-blogger.html"
target="_blank">Bloganol</a></b>
&nbsp; </font></td></tr>
<tr>
<td height="4"></td></tr></tbody></table><!-- News End
//--></div>
<div id="dd3" style="BORDER-RIGHT: #b5d6ef 1px solid;
BORDER-TOP: 0px; DISPLAY: none; VISIBILITY: hidden;
BORDER-LEFT: #b5d6ef 1px solid; WIDTH: 380px; BORDER-BOTTOM:
#b5d6ef 1px solid"
><!-- Business Begin //-->
<table border="0" cellspacing="0" cellpadding="0"
width="380">
<tbody>
<tr>
<td width="14"></td>
<td valign="top"><font color="#16387c" class="f12n">Tab 3
Content</font></td></tr>
<tr>
<td colspan="2" align="right"><font class="f10"><b> Widget
by <a href="http://bloganol.blogspot.com/2008/03/5-tabbed-content-widget-for-blogger.html"
target="_blank">Bloganol</a></b>
&nbsp; </font></td></tr>
<tr>
<td height="4"></td></tr></tbody></table><!-- Business End
//--></div>
<div id="dd4" style="BORDER-RIGHT: #b5d6ef 1px solid;
BORDER-TOP: 0px; DISPLAY: none; VISIBILITY: hidden;
BORDER-LEFT: #b5d6ef 1px solid; WIDTH: 380px; BORDER-BOTTOM:
#b5d6ef 1px solid"
><!-- Movies Begin //-->
<table border="0" cellspacing="0" cellpadding="0"
width="380">
<tbody>
<tr>
<td width="14"></td>
<td valign="top"><font color="#16387c" class="f12n">Tab 4
Content</font></td>
</tr>
<tr>
<td colspan="2" align="right"><font class="f10"><b> Widget
by <a href="http://bloganol.blogspot.com/2008/03/5-tabbed-content-widget-for-blogger.html"
target="_blank">Bloganol</a></b>
&nbsp; </font></td></tr>
<tr>
<td height="4"></td></tr></tbody></table><!-- Movies End
//--></div>
<div id="dd5" style="BORDER-RIGHT: #b5d6ef 1px solid;
BORDER-TOP: 0px; DISPLAY: none; VISIBILITY: hidden;
BORDER-LEFT: #b5d6ef 1px solid; WIDTH: 380px; BORDER-BOTTOM:
#b5d6ef 1px solid"
><!-- Sports Begin //-->
<table border="0" cellspacing="0" cellpadding="0"
width="380">
<tbody>
<tr>
<td width="14"></td>
<td valign="top"><font color="#16387c" class="f12n">Tab 5
Content</font></td></tr>
<tr>
<td colspan="2" align="right"><font class="f10"><b> Widget
by <a href="http://bloganol.blogspot.com/2008/03/5-tabbed-content-widget-for-blogger.html"
target="_blank">Bloganol</a></b>
&nbsp; </font></td></tr>
<tr>
<td
height="4"></td></tr></tbody></table>

<!-- Widget Code Ends Here -->

In the Above Code You will Find the Code , Replace that Code With Your Tab Header Title and Replace the Code With Your Tab Content.

Source: blogger-dashboard.blogspot.com
Read more »

New Read more widget for Blogger (the latest)

Wednesday, October 27, 2010

Finally blogger give easy way to make read more like wordpress.com, this function only active if you use new post editor. With Jump Breaks you can show just a snippet of your post on your blog's index page. Blogger will insert a "Read more" link to the full post page where your readers can keep reading.
Setting –> Basic –> Choose  “updated editor”


There are a couple of ways to insert a "Read more" jump to your posts. If you use the new post editor (available on Blogger in Draft, or by enabling it via the Settings tab), you'll notice the "Insert jump break" icon in the editor's toolbar. Click this icon and the "jump break" will be inserted into your blog post at your cursor's position.

Want to change the "Read more" text to something more your style? No problem. You can edit the "Read more" text by clicking Layout and then Edit the Blog Posts widget.

One more note, the Jump Break feature does not change how your post appears in your feed. You can configure post feed options by going to Settings | Basic | Site Feed, and editing Allow Blog Feeds.


Source: blogger-dashboard.blogspot.com
Read more »

Professional Related Posts with Thumbnails for Blogger

Monday, October 25, 2010

The latest Related Posts with Thumbnails for Blogger


New Version of Related Posts with Thumbnails for Blogger

Displaying the links to related posts along with a thumbnail of the corresponding post will help you increase the page views/user .Users will be tempted to go for the related posts when they are presented attractively with thumbnails. www.bloggerplugins.org has release this new widget !
Here are the detailed installation steps
1.First of all Login to your blogger dashboard and navigate to Layout > Edit HTML and check the "Expand Widget Templates" check box
2.Now look for
</head>
and replace it with
<!--Related Posts with thumbnails Scripts and Styles Start-->
<b:if cond='data:blog.pageType == &quot;item&quot;'>
<style type="text/css">
#related-posts {
float:center;
text-transform:none;
height:100%;
min-height:100%;
padding-top:5px;
padding-left:5px;
}
#related-posts h2{
font-size: 1.6em;
font-weight: bold;
color: black;
font-family: Georgia, &#8220;Times New Roman&#8221;, Times, serif;
margin-bottom: 0.75em;
margin-top: 0em;
padding-top: 0em;
}
#related-posts a{
color:black;
}
#related-posts a:hover{
color:black;
}
#related-posts  a:hover {
background-color:#d4eaf2;
}
</style>
<script src='http://blogergadgets.googlecode.com/files/relatedthumbs21.js' type='text/javascript'/>
</b:if>
<!--Related Posts with thumbnails Scripts and Styles End-->
</head>
3.Now Find
<div class='post-footer-line post-footer-line-1'>
If you cant find it then try finding this one
<p class='post-footer-line post-footer-line-1'>
Now immediately after any of these lines(whichever you could find) place this code snippet
<!-- Related Posts with Thumbnails Code Start-->
<b:if cond='data:blog.pageType == &quot;item&quot;'>
<div id='related-posts'>
<b:loop values='data:post.labels' var='label'>
<b:if cond='data:label.isLast != &quot;true&quot;'>
</b:if>
<b:if cond='data:blog.pageType == &quot;item&quot;'>
<script expr:src='&quot;/feeds/posts/default/-/&quot; + data:label.name + &quot;?alt=json-in-script&amp;callback=related_results_labels_thumbs&amp;max-results=6&quot;' type='text/javascript'/></b:if></b:loop><a href='http://www.bloggerplugins.org/2009/08/related-posts-thumbnails-blogger-widget.html' style='display:none;'>Related Posts with thumbnails for blogger</a><a href='http://www.bloggerplugins.org/' style='display:none;'>blogger widgets</a>
<script type='text/javascript'>
var currentposturl=&quot;<data:post.url/>&quot;;
var maxresults=5;
var relatedpoststitle="Related Posts";
removeRelatedDuplicates_thumbs();
printRelatedLabels_thumbs();
</script>
</div><div style='clear:both'/>
</b:if>
<!-- Related Posts with Thumbnails Code End—>
4.You can adjust the maximum number of related posts being displayed by editing this line in the code.
var maxresults=5;
5.To edit the title of the widget you can change this line of code
var relatedpoststitle="Related Posts";
To change the colors and all you will have to do is modify the CSS !


Source: blogger-dashboard.blogspot.com
Read more »

Top six jQuery plugin: Accordion Resource

Sunday, October 24, 2010

Creating Simple JQuery Accordion menu is very easy !


If you are searching to Make accordion menu using jquery for your site than you need to check the following resource :
Dynamic drive Accordion menu
Dynamic drive Accordion menu | Demo
jQuery Accordion Menu
i-MarcojQuery Accordion Menu | Demo
Horizonal Accordion Menu
Horizonal Accordion Menu | Demo
Bassistance jQuery Accordion
Bassistance jQuery Accordion | Demo
Designreviver Horizontal Accordion
Designreviver Horizontal Accordion | Demo
Phatfusion Image Menu
Phatfusion Image Menu | Demo
HAPPY BLOGGING :)

Source: blogger-dashboard.blogspot.com
Read more »

Animated Recent posts for blogger with thumbnails and Simple Spy

Tuesday, October 12, 2010

Finally Abu Farhan finished the widget from Bloggertricks.com and animation Simple Spy . Simple Spy style taken from Scarlet theme, results for wordpress can be found in this blog. View as below

Animated Recent posts widget for blogger


For bloggers you need to put the widget into the Sidebar Gadget (add gadget) select html, copy all html below to that gadget:

<script src="http://ajax.googleapis.com/ajax/libs/jquery/1.3.2/jquery.min.js" type="text/javascript"></script>
<style type="text/css" media="screen">
<!--
#spylist {
overflow:hidden;
margin-top:5px;
padding:0px 0px;
height:350px;
}
#spylist ul{
width:220px;
overflow:hidden;
list-style-type: none;
padding: 0px 0px;
margin:0px 0px;
}
#spylist li {
width:208px;
padding: 5px 5px;
margin:0px 0px 5px 0px;
list-style-type:none;
float:none;
height:70px;
overflow: hidden;
background:#fff url(http://dl.getdropbox.com/u/708209/scriptabufarhan/recentspy/post.jpg) repeat-x;
border:1px solid #ddd;
}
#spylist li a {
text-decoration:none;
color:#4B545B;
font-size:11px;
height:18px;
overflow:hidden;
margin:0px 0px;
padding:0px 0px 2px 0px;
}
#spylist li img {
float:left;
margin-right:5px;
background:#EFEFEF;
border:0;
}
.spydate{
overflow:hidden;
font-size:10px;
color:#0284C2;
padding:2px 0px;
margin:1px 0px 0px 0px;
height:15px;
font-family:Tahoma,Arial,verdana, sans-serif;
}
.spycomment{
overflow:hidden;
font-family:Tahoma,Arial,verdana, sans-serif;
font-size:10px;
color:#262B2F;
padding:0px 0px;
margin:0px 0px;
}
-->
</style>
    <script language='JavaScript'>
imgr = new Array();
imgr[0] = "http://i43.tinypic.com/orpg0m.jpg";
imgr[1] = "http://i43.tinypic.com/orpg0m.jpg";
imgr[2] = "http://i43.tinypic.com/orpg0m.jpg";
imgr[3] = "http://i43.tinypic.com/orpg0m.jpg";
imgr[4] = "http://i43.tinypic.com/orpg0m.jpg";
showRandomImg = true;
boxwidth = 255;
cellspacing = 6;
borderColor = "#232c35";
bgTD = "#000000";
thumbwidth = 70;
thumbheight = 70;
fntsize = 12;
acolor = "#666";
aBold = true;
icon = " ";
text = "comments";
showPostDate = true;
summaryPost = 40;
summaryFontsize = 10;
summaryColor = "#666";
icon2 = " ";
numposts = 10;
home_page = "http://www.raudhatulmuhibbin.org/";
limitspy=4
intervalspy=4000
</script>
<div id="spylist">
    <script src='http://dl.getdropbox.com/u/708209/scriptabufarhan/recentspy/recentpostthumbspy-min.js' type='text/javascript'></script>
</div>
for modification this widget to fit your template than you need to visit ABU FARHAN Blog here you go


Source: blogger-dashboard.blogspot.com
Read more »

Fancy jQuery Tabbed Content for blogger with beautiful images and background

Friday, October 8, 2010

jQuery Tabbed Interface / Tabbed Structure Menu Tutorial

tab menu structure diagram
a lot of bloggers are using tab based content as a way to save spaces in a webpage. I have seen a lot of blogger websites using a tabbed interface for its category, posts, comments and random posts content. It's a good "space-saver" and if used it correctly, it can boost your website usability as well. Right, first of all, we need to have the ideas and the design structure for this tabbed interface.
first let’s thanks queness.com for this beautiful widget with very nice icons and graphics!

1. Introduction

The ideas:
  • Buttons on the top, content reside in different DIV elements,
  • Click on one of the buttons, it shows the relevant content;
  • Click on other buttons, it hides the existing and display the correct one.
The Design structure:
* Thanks to WeFunction.com for the amazing icons

2. HTML

In case the image above doesnt load, allow me to explain the design structure again. The UL#tabMenu is the buttons on the top a.k.a. Tabs. This is where you click, and it will trigger the jQuery to loads the content.
Inside the boxBody, you need to specify 5 DIVs, the number of DIV will depend on how many items you defined in #tabMenu, in this case, we have 5, therefre, you need 5 DIV elements defined in .boxBody.
The javascript loads the content based on the DIV's index in .boxBody. For example, if you clicked o the first button (the star or index 0), it will load the first DIV in the .boxBody (DIV index 0).
Therefore, arrangement of DIV in .boxBody must match with the arrangement of button in #tabMenu.
<div class="box">   

<ul id="tabMenu">   
<li class="posts selected"></li> <!-- default button-->   
<li class="comments"></li>   
<li class="category"></li>   
<li class="famous"></li>   
<li class="random"></li>   
</ul>   

<div class="boxTop"></div>   

<div class="boxBody">   
<!-- default page-->   
<div id="posts" class="show">   
<ul>   
<li>Post 1</li>   
<li>Post 2</li>   
<li class="last">Post 3</li>   
</ul>     
</div>     

<div id="comments">   
<ul>   
<li>Comment 1</li>   
<li>Comment 2</li>   
<li class="last">Comment 3</li>   
</ul>   
</div>   

<div id="category">   
<ul>   
<li>Category 1</li>   
<li>Category 2</li>   
<li class="last">Category 3</li>   
</ul>     
</div>   

<div id="famous">   
<ul>   
<li>Famous post 1</li>   
<li>Famous post 2</li>   
<li class="last">Famous post 3</li>   
</ul>     
</div>   

<div id="random">   
<ul>   
<li>Random post 1</li>   
<li>Random post 2</li>   
<li class="last">Random post 3</li>   
</ul>       
</div>           

</div>   

<div class="boxBottom"></div>   

</div>   


3. CSS


You can always modify it to match your website.


<style>   

a {   
color:#ccc;   
text-decoration:none;   
}   

a:hover {   
color:#ccc;   
text-decoration:none   
}   

#tabMenu {   
margin:0;   
padding:0 0 0 15px;   
list-style:none;   
}   

#tabMenu li {   
float:left;   
height:32px;   
width:39px;   
cursor:pointer;   
cursor:hand   
}   

/* this is the button images */   
li.comments {background:url(images/tabComment.gif) no-repeat 0 -32px;}   
li.posts {background:url(images/tabStar.gif) no-repeat 0 -32px;}   
li.category {background:url(images/tabFolder.gif) no-repeat 0 -32px;}   
li.famous {background:url(images/tabHeart.gif) no-repeat 0 -32px;}   
li.random {background:url(images/tabRandom.gif) no-repeat 0 -32px;}   

li.mouseover {background-position:0 0;}   
li.mouseout {background-position:0 -32px;}   
li.selected {background-position:0 0;}   

.box {   
width:227px   
}   

.boxTop {   
background:url(images/boxTop.gif)no-repeat;   
height:11px;   
clear:both   
}   

.boxBody {   
background-color:#282828;   
}   

.boxBottom {   
background:url(images/boxBottom.gif) no-repeat;   
height:11px;   
}   

.boxBody div {   
display:none;   
}     
.boxBody div.show {   
display:block;   
}    
.boxBody #category a {   
display:block   
}   

/* styling for the content*/   
.boxBody div ul {   
margin:0 10px 0 25px;   
padding:0;   
width:190px;   
list-style-image:url(images/arrow.gif)   
}   

.boxBody div li {   
border-bottom:1px dotted #8e8e8e;    
padding:4px 0;   
cursor:hand;   
cursor:pointer   
}   

.boxBody div ul li.last {   
border-bottom:none   
}   

.boxBody div li span {   
font-size:8px;   
font-style:italic;    
color:#888;   
}   

/* IE Hacks */   
*html .boxTop {margin-bottom:-2px;}   
*html .boxBody div ul {margin-left:10px;padding-left:15px;}   

</style>


4. Javascript


<SCRIPT type="text/javascript">   

$(document).ready(function() {     

//Get all the LI from the #tabMenu UL   
$('#tabMenu > li').click(function(){   

//perform the actions when it's not selected   
if (!$(this).hasClass('selected')) {       

//remove the selected class from all LI       
$('#tabMenu > li').removeClass('selected');   

//After cleared all the LI, reassign the class to the selected tab   
$(this).addClass('selected');   

//Hide all the DIV in .boxBody   
$('.boxBody div').slideUp('1500');   

//Look for the right DIV index based on the Navigation UL index   
$('.boxBody div:eq(' + $('#tabMenu > li').index(this) + ')').slideDown('1500');   

}   

}).mouseover(function() {   

//Add and remove class, Personally I dont think this is the right way to do it,    
//if you have better ideas to toggle it, please comment       
$(this).addClass('mouseover');   
$(this).removeClass('mouseout');      

}).mouseout(function() {    

//Add and remove class   
$(this).addClass('mouseout');   
$(this).removeClass('mouseover');       

});   


//Mouseover with animate Effect for Category menu list  :)   
$('.boxBody #category li').mouseover(function() {   

//Change background color and animate the padding   
$(this).css('backgroundColor','#888');   
$(this).children().animate({paddingLeft:"20px"}, {queue:false, duration:300});   
}).mouseout(function() {   

//Change background color and animate the padding   
$(this).css('backgroundColor','');   
$(this).children().animate({paddingLeft:"0"}, {queue:false, duration:300});   
});     

//Mouseover effect for Posts, Comments, Famous Posts and Random Posts menu list.   
$('.boxBody li').click(function(){   
window.location = $(this).find("a").attr("href");   
}).mouseover(function() {   
$(this).css('backgroundColor','#888');   
}).mouseout(function() {   
$(this).css('backgroundColor','');   
});      

});   

</SCRIPT>  


5. Finally


You will get a beautiful jQuery Tabbed Side Menu! However, in category page, if you were using IE, the LI can't be hightlighted when mouse hover it in (that's why we all hate IE). If you know what's the problem, please advise : ) now check out the demo or download the source code to play with it. Any questions. please leave your comment :) Support me by bookmark this article and share it to your friends : ) Thanks


Update


14-4-2009: Remove click event in the LI, change the display attribute in #category to block.

Demonstration Download

note please : if you want support on how to install this widget for blogger ! than please comment bellow requesting the tutorial for the installation ! i will be happy to help you guys :)


Source: blogger-dashboard.blogspot.com
Read more »

Beautiful Recent Posts with Thumbnails Widget for Blogger

Wednesday, October 6, 2010

Searching for Recent Posts Widget with Thumbnails  for Blogger !


This post explains how to add Recent Posts widget in Blogger with image thumbnails:
well they are many hacks up there on the net for RECENT POSTS BLOGGER !
and actually i have tried many of them ! and while i was surfing  the net than i found this amazing hack !
finally i have got what i want ! this widget was made by the legend  “bloggertricks”   we thanks him for this amazing widget ,very simple recent posts …bravo for the great job !
Features:
Thumbails to Recent Posts
Comment Count

So, let's see how to install this cool widget in your blog..

1. Sign into Blogger dashboard
2. Go to Layout » Add a gadget » html/javascript


3. Just copy and paste this code..
<script language="JavaScript">

imgr = new Array();


imgr[0] = "http://i43.tinypic.com/orpg0m.jpg";

imgr[1] = "http://i43.tinypic.com/orpg0m.jpg";

imgr[2] = "http://i43.tinypic.com/orpg0m.jpg";

imgr[3] = "http://i43.tinypic.com/orpg0m.jpg";

imgr[4] = "http://i43.tinypic.com/orpg0m.jpg";
showRandomImg = true;

boxwidth = 298;

cellspacing = 8;

borderColor = "#ffffff";

bgTD = "#000000";

thumbwidth = 40;

thumbheight = 40;

fntsize = 12;

acolor = "#666";

aBold = true;

icon = " ";

text = "comments";

showPostDate = false;

summaryPost = 40;

summaryFontsize = 10;

summaryColor = "#666";

icon2 = " ";

numposts = 5;

home_page = "http://schemar-mag.blogspot.com/";

</script>

<script src="http://myblogtalk.com/bloggertemplates/js/recentposts_thumbnail.js" type="text/javascript"></script>


home_page : http://schemar-mag.blogspot.com/ (change this to your blog url)


Note : Make sure you selected YES in Settings » Site Feed » Full » Allow Blog Feeds


4. Save the Changes and happy widget :)


Source: blogger-dashboard.blogspot.com
Read more »

Label Cloud Widget for Blogger new release

Tuesday, October 5, 2010

Blogger Releases the new version of the Label Widget

Blogger,as a part of its 10th Birthday celebrations, has now released a new version of the label gadget.This one is much better that the old version
What is new?
1)It comes with a Label Cloud.
2)It lets you choose which labels are to be displayed.
3)You can customize it further using CSS.
Drawbacks
The cloud just has 5 variations.All labels will be divided into 5 classes depending on the usage of these labels.
It would have been better if there was a bigger number of classes.

 
as you see above ! you have the option to select whatever category you want it to show ! if you have any question just leave comment and i will answer you ASAP ! Happy Clouds :)


Source: blogger-dashboard.blogspot.com
Read more »

Tabbed Content Widget Box For Blogger

Sunday, October 3, 2010

A Professional tabbed navigation widget for blogger templates !

I know there are quite a few tutorials out there that demonstrate how to create tabs with CSS & jQuery ! but after my research on the net for blogger tabbed navigation content  ! finally i came out with the following source THIS WIDGET CREATED BY THE LAGENT SOHTANAKA.COM :

Simple Tabs w/ CSS & jQuery


Follow These Step to Install this widget >>
1. Log in to your Blogger account
2. On your Blogger Dashboard, click on the "Layout" link as shown in the blow image


3. Click On "Add a Gadget" as displayed in the Below Image

4.Scroll down the list and find "HTML/ Javascript" and click on the "+" button

FINALLY INSERT THIS CODE WHICH IS BELLOW AND SAVE IT ! THAN PREVIEW YOUR TEMPLATE :) DONE
<style type="text/css">
body {
background: #f0f0f0;
margin: 0;
padding: 0;
font: 10px normal Verdana, Arial, Helvetica, sans-serif;
color: #444;
}
h1 {font-size: 3em; margin: 20px 0;}
.container {width: 500px; margin: 10px auto;}
ul.tabs {
margin: 0;
padding: 0;
float: left;
list-style: none;
height: 32px;
border-bottom: 1px solid #999;
border-left: 1px solid #999;
width: 100%;
}
ul.tabs li {
float: left;
margin: 0;
padding: 0;
height: 31px;
line-height: 31px;
border: 1px solid #999;
border-left: none;
margin-bottom: -1px;
background: #e0e0e0;
overflow: hidden;
position: relative;
}
ul.tabs li a {
text-decoration: none;
color: #000;
display: block;
font-size: 1.2em;
padding: 0 20px;
border: 1px solid #fff;
outline: none;
}
ul.tabs li a:hover {
background: #ccc;
}    
html ul.tabs li.active, html ul.tabs li.active a:hover  {
background: #fff;
border-bottom: 1px solid #fff;
}
.tab_container {
border: 1px solid #999;
border-top: none;
clear: both;
float: left; 
width: 100%;
background: #fff;
-moz-border-radius-bottomright: 5px;
-khtml-border-radius-bottomright: 5px;
-webkit-border-bottom-right-radius: 5px;
-moz-border-radius-bottomleft: 5px;
-khtml-border-radius-bottomleft: 5px;
-webkit-border-bottom-left-radius: 5px;
}
.tab_content {
padding: 20px;
font-size: 1.2em;
}
.tab_content h2 {
font-weight: normal;
padding-bottom: 10px;
border-bottom: 1px dashed #ddd;
font-size: 1.8em;
}
.tab_content h3 a{
color: #254588;
}
.tab_content img {
float: left;
margin: 0 20px 20px 0;
border: 1px solid #ddd;
padding: 5px;
}
</style>
<script type="text/javascript"
src="http://ajax.googleapis.com/ajax/libs/jquery/1.3/jquery.min.js"></script>
<script type="text/javascript">

$(document).ready(function() {

//Default Action
$(".tab_content").hide(); //Hide all content
$("ul.tabs li:first").addClass("active").show(); //Activate first tab
$(".tab_content:first").show(); //Show first tab content

//On Click Event
$("ul.tabs li").click(function() {
$("ul.tabs li").removeClass("active"); //Remove any "active" class
$(this).addClass("active"); //Add "active" class to selected tab
$(".tab_content").hide(); //Hide all tab content
var activeTab = $(this).find("a").attr("href"); //Find the rel attribute value to identify the active tab + content
$(activeTab).fadeIn(); //Fade in the active content
return false;
});

});
</script>
</head>

<body>

<ul class="tabs">
<li><a href="#tab1">Gallery</a></li>
<li><a href="#tab2">Submit</a></li>
<li><a href="#tab3">NEWS</a></li>
<li><a href="#tab4">FAQ</a></li>
</ul>

<div class="tab_container">
<div id="tab1" class="tab_content">
<!--Content-->
</div>
<div id="tab2" class="tab_content">
<!--Content-->
</div>
<div class="tab_container">
<div id="tab3" class="tab_content">
<!--Content-->
</div>
<div class="tab_container">
<div id="tab4" class="tab_content">
<!--Content-->
</div>
</div>
</body>
</html>


NOTE : THIS WIDGET IS MADE ON WIDTH 500px SO IF YOUR SIDEBAR OR THE PLACE WHERE YOU WANT THIS WIDGET IS LESS OR MORE THAN YOU NEED TO ADJUST THE SIZE TO YOUR NEED !


You may want to see here another tabbed widget for blogger !


Easy 5 tabbed Content Widget for Blogger


THANKS AND WELCOME : GO GUMGUM:)


Source: blogger-dashboard.blogspot.com
Read more »

Beautiful Social Bookmarking Box For your blog

Friday, September 24, 2010


Create fancy share box with CSS and jQuery

This tutorial will show you how to turn unordered list (UL) into an fancy social bookmarking sharing box. You will see how to style such box, how to add interactivity!
how to create jQuery plugin that will turn any UL into sharing box.
The idea is to have all of the buttons shown inline and partially hidden. When user hovers over a button it slides to the right and become visible.
go Check it from the author .
Check here another sexy bookmarking widget for blogger !

Super Sexy Bookmarks Widget for Blogger 


Source: blogger-dashboard.blogspot.com
Read more »

Very Simple Blogger Tag Cloud Widget for your Blog

Friday, September 17, 2010


Searching for tag cloud widget for your blog ? well they are so many up there on the net ! but since many people want and search for easy way ! so here is the easy GUM GUM :)
Actually this hack brought to you by Raymond which was the most simple blogger tag cloud i ever found until now !
How to apply:
============

Installation:

If you already have a Labels page element installed, skip to step 2.

Step 1: Install the Labels page element by browsing to your template settings:


Click "Add a Page Element" in the column you wish:


Then find the Labels page element and click "Add to Blog":


Step 2: Replace the Labels page element widget code with the custom tag cloud code above.

First navigate to your templates source under your template settings:


Then check off "Expand Widget Templates":


Search for the Label page element you are replacing by searching for widget code. It will look something like this
<b:widget id='Label1' locked='false' title='Tags' type='Label'>
but id and title maybe different, so use your browser's search tool and look for type='Label'.

Delete the Label widget code from the start to the end marked by
</b:widget>
and replace with the custom Tag Cloud code from above.
<b:widget id='Label1' locked='false' title='Tags' type='Label'>
<b:includable id='main'>
<b:if cond='data:title'>
<h2><data:title/></h2>
</b:if>
<div class='widget-content' style='text-align: justify;'>
<script type='text/javascript'>
/*
Simple Blogger Tag Cloud Widget
by Raymond May Jr.
http://www.compender.com
Released to the Public Domain
*/

//Settings / Variables
var max = 150; //max css size (in percent)
var min = 70; //min css size (in percent)
var showCount = false;  // show counts? true for yes, false for no
var minCount = 1;  // what is the minimum count for a tag to be shown? 1 for all


//Begin code:
var range = max - min;

//Build label Array
var labels = new Array();
<b:loop values='data:labels' var='label'>
labels.push(&quot;<data:label.name/>&quot;);
</b:loop>

//URLs
var urls = new Array();
<b:loop values='data:labels' var='label'>
urls.push(&quot;<data:label.url/>&quot;);
</b:loop>

//Counts
var counts = new Array();
<b:loop values='data:labels' var='label'>
counts.push(&quot;<data:label.count/>&quot;);
</b:loop>

//Number sort funtion (high to low)
function sortNumber(a, b)
{
return b - a;
}

//Make an independant copy of counts for sorting
var sorted = counts.slice();

//Find the largest tag count
var most = sorted.sort(sortNumber)[0];

//Begin HTML output
for (x in labels)
{
if(x != &quot;peek&quot; &amp;&amp; x != &quot;forEach&quot; &amp;&amp; counts[x] >= minCount)
{
//Calculate textSize
var textSize = min + Math.floor((counts[x]/most) * range);
//Show counts?
if(showCount)
{
var count = &quot;(&quot; + counts[x] + &quot;)&quot;;
}else{
var count = &quot;&quot;;
}
//Output
document.write(&quot;<span style='font-size:&quot; + textSize + &quot;%'><a href='&quot; + urls[x] + &quot;' style='text-decoration:none;'>&quot; + labels[x] + count + &quot;</a></span> &quot; );
}
}
</script>
</div>
</b:includable>
</b:widget>


Happy Blogging … GUM GUM :)


Read more »

Super Sexy Bookmarks Widget for Blogger

Tuesday, September 14, 2010


Looking for professional Social Bookmark Buttons for your blog ! me too :) however, while i was searching the net too, I came across a post by Naeemnur, that had instructions for Blogger (BlogSpot.com) based blogs which was really good.If your have a blog on blogger you can definitely give this a try.
Note : Remember to backup your template and widgets before making any changes to your template.
1. Goto Dashboard -> Layout -> Edit HTML and select Expand Widget Templates.
2. Put this code before </head>
<style type='text/css'> div.sexy-bookmarks { height:54px; background:url('http://i43.tinypic.com/2ueii3t.png') no-repeat left bottom; position:relative; width:540px; } 
div.sexy-bookmarks span.sexy-rightside { width:17px; height:54px; background:url('http://i43.tinypic.com/2ueii3t.png') no-repeat right bottom; position:absolute; right:-17px; } 
div.sexy-bookmarks ul.socials { margin:0 !important; padding:0 !important; position:absolute; bottom:0; left:10px; } 
div.sexy-bookmarks ul.socials li { display:inline-block !important; float:left !important; list-style-type:none !important; margin:0 !important; height:29px !important; width:48px !important; cursor:pointer !important; padding:0 !important; } 
div.sexy-bookmarks ul.socials a { display:block !important; width:48px !important; height:29px !important; font-size:0 !important; color:transparent !important; } 
.sexy-furl, .sexy-furl:hover, .sexy-digg, .sexy-digg:hover, .sexy-reddit, .sexy-reddit:hover, .sexy-stumble, .sexy-stumble:hover, .sexy-delicious, .sexy-delicious:hover, .sexy-yahoo, .sexy-yahoo:hover, .sexy-blinklist, .sexy-blinklist:hover, .sexy-technorati, .sexy-technorati:hover, .sexy-facebook, .sexy-facebook:hover, .sexy-twitter, .sexy-twitter:hover, .sexy-myspace, .sexy-myspace:hover, .sexy-mixx, .sexy-mixx:hover, .sexy-script-style, .sexy-script-style:hover, .sexy-designfloat, .sexy-designfloat:hover, .sexy-syndicate, .sexy-syndicate:hover, .sexy-email, .sexy-email:hover { background:url('http://i44.tinypic.com/1znbj83.png') no-repeat !important; } 
.sexy-furl { background-position:-300px top !important; } 
.sexy-furl:hover { background-position:-300px bottom !important; } 
.sexy-digg { background-position:-500px top !important; } 
.sexy-digg:hover { background-position:-500px bottom !important; } 
.sexy-reddit { background-position:-100px top !important; } 
.sexy-reddit:hover { background-position:-100px bottom !important; } 
.sexy-stumble { background-position:-50px top !important; } 
.sexy-stumble:hover { background-position:-50px bottom !important; } 
.sexy-delicious { background-position:left top !important; } 
.sexy-delicious:hover { background-position:left bottom !important; } 
.sexy-yahoo { background-position:-650px top !important; } 
.sexy-yahoo:hover { background-position:-650px bottom !important; } 
.sexy-blinklist { background-position:-600px top !important; } 
.sexy-blinklist:hover { background-position:-600px bottom !important; } 
.sexy-technorati { background-position:-700px top !important; } 
.sexy-technorati:hover { background-position:-700px bottom !important; } 
.sexy-myspace { background-position:-200px top !important; } 
.sexy-myspace:hover { background-position:-200px bottom !important; } 
.sexy-twitter { background-position:-350px top !important; } 
.sexy-twitter:hover { background-position:-350px bottom !important; } 
.sexy-facebook { background-position:-450px top !important; } 
.sexy-facebook:hover { background-position:-450px bottom !important; } 
.sexy-mixx { background-position:-250px top !important; } 
.sexy-mixx:hover { background-position:-250px bottom !important; } 
.sexy-script-style { background-position:-400px top !important; } 
.sexy-script-style:hover { background-position:-400px bottom !important; } 
.sexy-designfloat { background-position:-550px top !important; } 
.sexy-designfloat:hover { background-position:-550px bottom !important; } 
.sexy-syndicate { background-position:-150px top !important; } 
.sexy-syndicate:hover { background-position:-150px bottom !important; } 
.sexy-email { background-position:-753px top !important; } 
.sexy-email:hover { background-position:-753px bottom !important; } </style>
3. Now Put the below code after <data:post.body/>

<div class='sexy-bookmarks'> <ul class='socials'> 
<li class='sexy-delicious'><a expr:href='&quot;http://del.icio.us/post?url=&quot;   data:post.url   &quot;&amp;title=&quot;   data:post.title' target='_blank'/></li><li class='sexy-digg'><a expr:href='&quot; http://digg.com/submit?url=&quot;   data:post.url   &quot;&amp;title=&quot;   data:post.title' target='_blank'/></li> 
<li class='sexy-technorati'><a expr:href='&quot; http://technorati.com/faves?add=&quot;   data:post.url   &quot;&amp;title=&quot;   data:post.title' target='_blank'/></li> 
<li class='sexy-reddit'><a expr:href='&quot; http://www.reddit.com/submit?url=&quot;   data:post.url   &quot;&amp;title=&quot;   data:post.title' target='_blank'/></li> 
<li class='sexy-stumble'><a expr:href='&quot; http://www.stumbleupon.com/submit?url=&quot;   data:post.url   &quot;&amp;title=&quot;   data:post.title' target='_blank'/></li> 
<li class='sexy-designfloat'><a expr:href='&quot;http://www.designfloat.com/submit.php?url=&quot;   data:post.url   &quot;&amp;title=&quot;   data:post.title' target='_blank'/></li> 
<li class='sexy-facebook'><a expr:href='&quot; http://www.facebook.com/sharer.php?u=&quot;   data:post.url   &quot;&amp;title=&quot;   data:post.title' target='_blank'/></li> 
<li class='sexy-twitter'><a expr:href='&quot; http://twitthis.com/twit?url=&quot;   data:post.url   &quot;&amp;title=&quot;   data:post.title' target='_blank'/></li> 
<li class='sexy-furl'><a expr:href='&quot; http://www.furl.net/storeIt.jsp?u=&quot;   data:post.url   &quot;&amp;title=&quot;   data:post.title' target='_blank'/></li> 
<li class='sexy-syndicate'><a href='http://feeds.feedburner.com/bloggerdashboard' title='Subscribe to RSS'/></li> 
<li class='sexy-email'><a expr:href='&quot; mailto:?subject=&quot;   data:post.url   &quot;&amp;title=&quot;   data:post.title' target='_blank'/></li> </ul> 
<span class='sexy-rightside'/></div>
Dont Forget to replace my feedburner id (bloggerdashboard) with yours. and if you have any question just nock ! nock ! :) i will me happy to help u guys :)

Read more »


Copyright © 2010 Blogger Tips And Tricks | Affiliate Marketing | Make Money Blogging. All Rights Reserved. Using Xclear Theme | Bloggerized by Themescook Developed by Helios | Powered by Blogger